Spotted someone out on the water holding what looks like a hand-held kite while their board hovers above the surface on a thin underwater fin? That's wing foiling — the fastest-growing foiling discipline and one of the most accessible ways to learn how to fly above the water.
This guide walks through what wing foiling is, how the gear works together, what to look for in your first kit, and how to get started. Written by the team at PPC Foiling, who design and build wing foiling gear out of Wairau Valley, Auckland.
What is wing foiling?
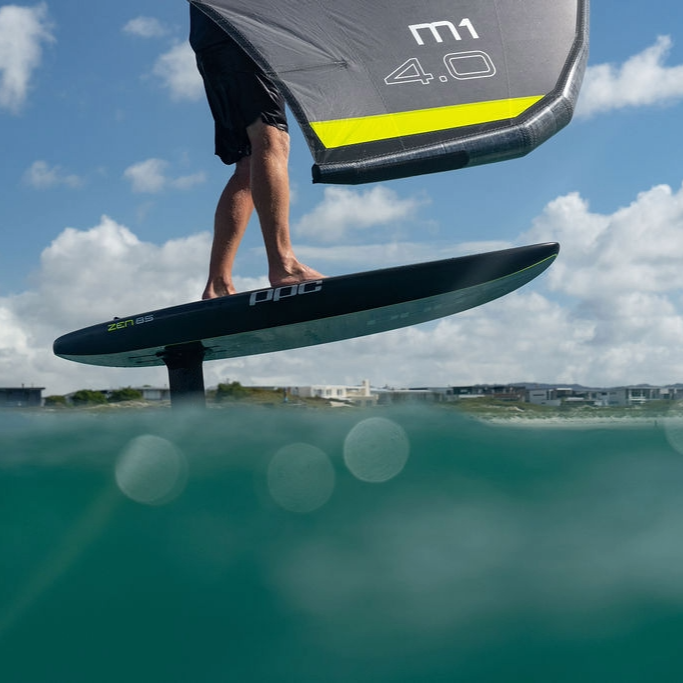
Wing foiling combines a short, high-volume board fitted with an underwater hydrofoil and a handheld inflatable wing. The wing catches the wind and provides forward momentum. The foil — once you're moving fast enough — generates lift and pulls the board clear of the water. The result is a near-silent ride that feels closer to flight than surfing.
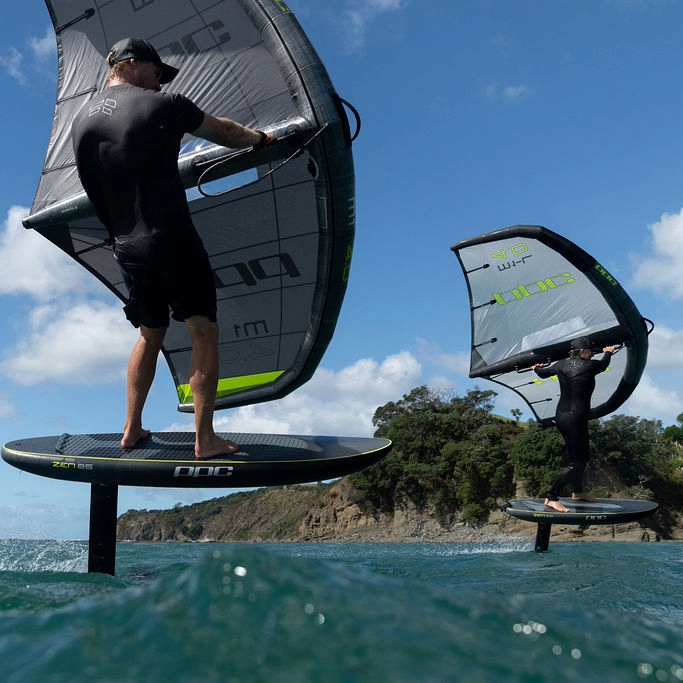
The wing is not attached to the board. That's the key difference between wing foiling and windsurfing (where the rig is fixed to the board) or kitesurfing (where you're tethered by lines). You hold the wing in your hands like a bar, neutralise it by letting one handle go, and tack or jibe by passing it overhead.
How wing foiling works
Three forces are working at once.
The wing catches the wind and pulls you forward. It's an inflatable shape — leading edge tube and one or two struts — that holds rigid shape when pumped up. You sheet it in or out using the rear handle, the same way you'd sheet a sail.
The board floats you and your gear. Beginners use high-volume boards (110-130 litres) so they can stand up and uphaul the wing without sinking. As you progress you drop volume — sub-50L boards are common for advanced riders.
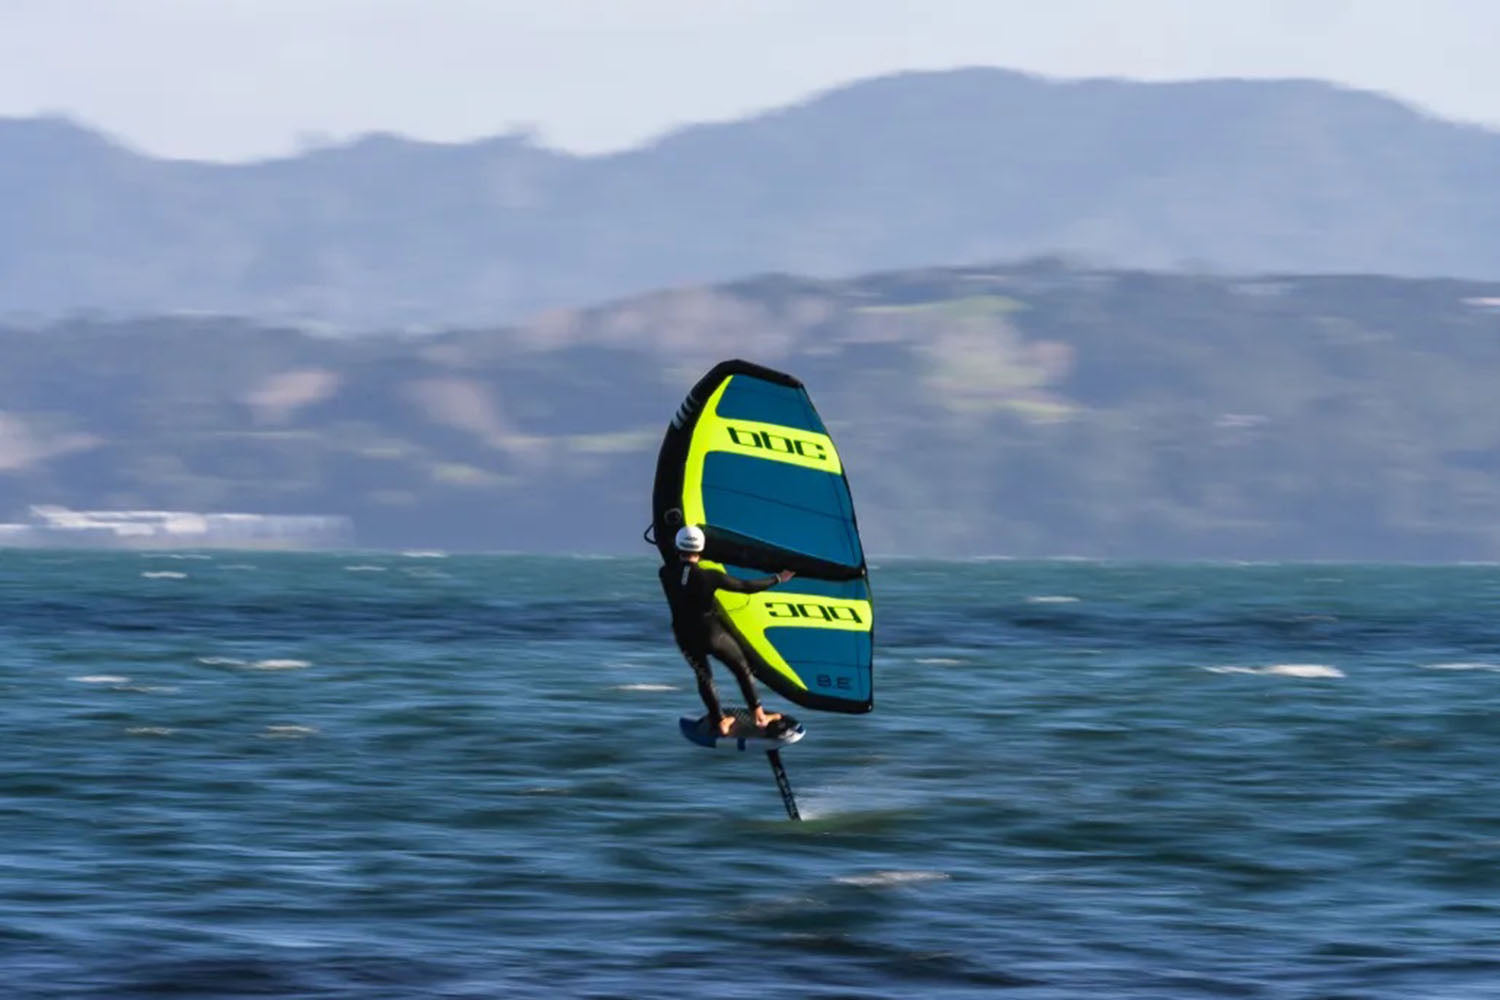
The foil is the part that creates lift. Once you're moving above roughly 6 knots over water, the front wing of the foil generates enough lift to raise the board clear of the surface. From there, drag drops dramatically, speed climbs, and you carve like an aircraft cornering on a banked turn.
The gear — wings, boards, foils, leashes
Wings
An inflatable wing has a leading edge tube, one or two struts, a canopy of ripstop or dual-skin material, and a set of handles or a boom. Race wings have stiffer frames and dual-skin canopies for power. Beginner wings prioritise forgiving handling and value pricing. PPC builds a full range — the M1-L for learners, the M2 for all-round riding, the M1-X for wave and freestyle, the M1 for high performance, and the Sonic FDS for racing.
Boards
Wing foil boards are short, wide and thick to give you a stable platform during launch. Volume matters more than length. Beginners want 30-40 litres above body weight in kg. Intermediate riders shift to lower volume for more responsive turning. PPC's Soar covers the learner-to-intermediate range; the Soar Pro is the narrower, faster advanced version. Full board range at PPC Foiling Boards.
Foils
A hydrofoil is the underwater structure that creates lift. It has three main parts: the mast (vertical shaft connecting board to foil), the fuselage (horizontal section), and the wings — a larger front wing and smaller stabiliser at the rear.
Beginners want a mid-aspect, high-surface-area front wing for stability and early lift. Advanced riders move to higher-aspect, lower-surface-area front wings for speed and glide. Mast length matters too — shorter masts (60-75cm) are easier to control while learning; longer masts (85-100cm) handle deeper carves and rougher water.
Leashes
Two leashes: one connects the board to your ankle or waist, the other connects the wing to your wrist. The wing leash is critical — if you fall and let go, the wing can fly downwind faster than you can swim. PPC's wrist leash, waist leash and coil board leash all work for different rider preferences.
Choosing your first wing
Three things matter: size, build, and rider weight match.
Size — measured in square metres. A rider around 75-85kg in 15-20 knot conditions wants a 5.0m wing. Lighter wind or heavier rider, size up. Stronger wind, size down. Most riders end up owning two wings to cover a wider wind range.
Build — frame stiffness, canopy material, handle ergonomics. Stiffer wings generate more power and pump harder. Lighter materials (like the Exo-PE canopies on PPC's M1-X) make sustained flying less tiring. Handles vs boom is personal preference — boom feels closer to windsurfing, handles are simpler.
Rider weight — a 60kg rider on a 6m wing is overpowered; a 95kg rider on a 4m wing is underpowered. The PPC wings collection lists weight recommendations per size to make this clear.
Choosing your first board
Volume is everything for a beginner. Aim for body weight in kg + 30 to 40 litres of volume. An 80kg rider wants a 110-120L board. Higher volume forgives slow uphauling and unsteady balance. Once you're foiling consistently you'll drop down to body weight + 0 or even negative volume.
Beyond volume, look at width (wider = more stable), foot strap inserts (most boards offer strap or strapless riding), and construction (PPC builds with MCT carbon sandwich for stiffness-to-weight). Boards built specifically for wing foiling have flatter rockers and shorter outlines than crossover SUP foil boards — the difference matters once you're going fast.
Choosing your first foil
Match the foil to your weight and the conditions. Beginners want a high-lift, high-stability foil — usually a 1500-2000 sq cm front wing on a 75cm mast. Advanced riders move to smaller, faster, higher-aspect front wings.
If you're buying as a complete kit, the foil package from your wing and board brand usually matches the rest of the gear. If you're piecing it together, ask the shop what front wing surface area suits your weight and your wind.
How to learn wing foiling
Six steps that cut weeks off the learning curve.
1. Practice the wing on land first. Stand in a grassy area in 10-15 knots. Hold the wing by both handles, learn to sheet in and out, walk forward and back, jibe overhead. Twenty minutes on land beats two hours on the water.
2. Get on a SUP without the foil. Use a stable stand-up paddleboard or a large foil board with the foil removed. Practise carrying the wing while sailing across the wind. You'll learn the wing's behaviour without the added complexity of the foil.
3. Ride the foil behind a boat or jet ski. If you can borrow a tow setup, learn the foil's behaviour at low speed without the wing in your hands. Many learners find this skips two or three frustrating sessions of crashes.
4. Pick the right wind. 15-20 knot steady gradient wind is the sweet spot for first sessions. Avoid offshore wind (gear can blow away if you lose it) and gusty conditions (overpowering moments throw you off).
5. Use the right gear. Borrow, demo or buy beginner-spec equipment. An advanced board and high-aspect foil will make learning much harder. The PPC Soar with an M1-L wing and a low-aspect foil is the kit we set up for first-timers.
6. Take a lesson. A coached intro session is the single best return on investment for a new rider. You'll skip several frustrating sessions. PPC runs intro sessions out of our Wairau Valley showroom in Auckland with all gear supplied — gear and instructor included.
Wing foiling vs other water sports
vs windsurfing — wing foiling has less gear to rig, no fixed rig to balance, and the wing depowers instantly. Windsurfing is faster to plane in light wind and has a longer ceiling for advanced skills.
vs kitesurfing — wing foiling has no lines, no kite to relaunch from the water, no risk of lofting, and you can launch and land solo. Kitesurfing covers more ground faster once you're committed.
vs prone foiling — wing foiling uses the wind for power; prone foiling uses waves or paddling. Prone is harder to learn but lighter on the gear list.
vs downwind foiling — downwind foiling uses a paddle and bumps in the open ocean for power. It's a different mental game and a different fitness demand. The Link and R1 boards cover downwind specifically.
Where to ride and where to learn
For PPC riders in Auckland, the most-used spots are around Takapuna, Browns Bay and Long Bay on the North Shore — protected enough for learning, exposed enough to deliver good wind. Our Wairau Valley showroom at 10B/89 Ellice Road, Auckland runs intro sessions and demos by appointment. We ship globally if you're not in NZ.
Common questions
What is wing foiling?
Wing foiling is a water sport where you ride a short board fitted with an underwater hydrofoil, while holding a handheld inflatable wing to catch the wind. The wing pulls you forward; the foil lifts the board clear of the water once you reach speed. The result is a near-silent, low-drag ride that feels like flying. The wing is not attached to the board, which is what separates wing foiling from windsurfing and kitesurfing.
Is wing foiling hard to learn?
Wing foiling is one of the more approachable foiling disciplines. Most people who try it with a stable beginner setup are foiling within three to five sessions. It's easier to learn than kitesurfing and gentler than windsurfing because the wing is held in your hands and can be neutralised instantly — you just let go of one handle and the wing depowers.
How long does it take to learn wing foiling?
Expect three to ten sessions to be riding consistently on the foil. Standing on the board with the wing comes in the first session. Carving and going upwind take longer. A coached lesson cuts the learning time in roughly half compared to teaching yourself.
What gear do I need to start wing foiling?
A beginner kit is a stable high-volume foil board, an entry-level wing matched to your weight and local wind, a hydrofoil with a forgiving mid-aspect front wing, a wing leash, and a board leash. A wetsuit, helmet and impact vest are smart adds. PPC's beginner stack is the Soar foil board with an M1-L wing — built specifically to be friendly and fast to progress on.
What size wing should a beginner use?
Match the wing to your body weight and your typical wind. A rider around 75-85kg in 15-20 knot conditions usually starts on a 5.0m wing. Lighter riders or stronger wind go down to 4.0m. Heavier riders or lighter wind go up to 6.0m. Two wings — one big, one small — covers most days once you progress.
What size board should a beginner use?
Add 30-40 litres to your body weight in kilograms. So an 80kg rider wants a 110-120L board. Higher volume means more stability when standing up and uphauling the wing. Once you're foiling consistently you'll move to smaller boards for speed and feel. The PPC Soar 73L and 83L are popular intermediate volumes; new riders typically want more.
What wind range is best for wing foiling?
12 to 25 knots is the sweet spot for learning. Below 10 knots you'll struggle to generate power. Above 25 the wing becomes harder to handle and the water gets choppy. Steady gradient wind beats gusty offshore wind for learning.
Do I need lessons for wing foiling?
You don't strictly need lessons but they speed everything up. A coach gets you on the foil faster, teaches you safer carving habits, and helps you avoid bad muscle memory. If you're in Auckland, PPC runs intro sessions out of our Wairau Valley showroom with all gear supplied.
Is wing foiling safer than kitesurfing?
Generally yes. The wing has no lines and can be depowered instantly. There's no risk of being lofted or dragged like with a kite. The main hazards are the foil itself (always wear a helmet and impact vest near it) and equipment loss in offshore wind.
What's the best PPC wing for a beginner?
The M1-L wing. It's PPC's entry-priced wing with a Dyneema-reinforced frame and carbon ergo boom, built to be forgiving while you learn. Once you progress, riders typically move to the M2 (all-round) or M1-X (lightweight wave/freestyle). The M1 is the high-performance original. Sonic FDS and Vortex SDS are the race wings.